Using Burp Suite with ProxyMesh
This article describes Burp Suite and the steps for configuring it for use with ProxyMesh.
Burp Suite is a graphical tool for testing Web application security. The tool performs some functions of an HTTP proxy, positioned between a browser and destination web servers, and provides a view into raw traffic in both directions. Burp Suite also enables automatic crawling of web applications.
Here is a link to a general description of Burp Suite and a video with steps to install and configure the tool. The video features methods for Linux: https://www.pentestgeek.com/what-is-Burp Suite
Configuring for ProxyMesh
Below are proxy settings needed to use Burp with ProxyMesh. This will enable you to run tests, send requests, and easily track IPs in rotation.
User Options Tab
From the Burp dashboard, select the User Options tab to Input the proxy settings you'll need to use Burp in ProxyMesh.
Add a Server
On the User options tab, in the Upstream Proxy Servers section, click the Add button.
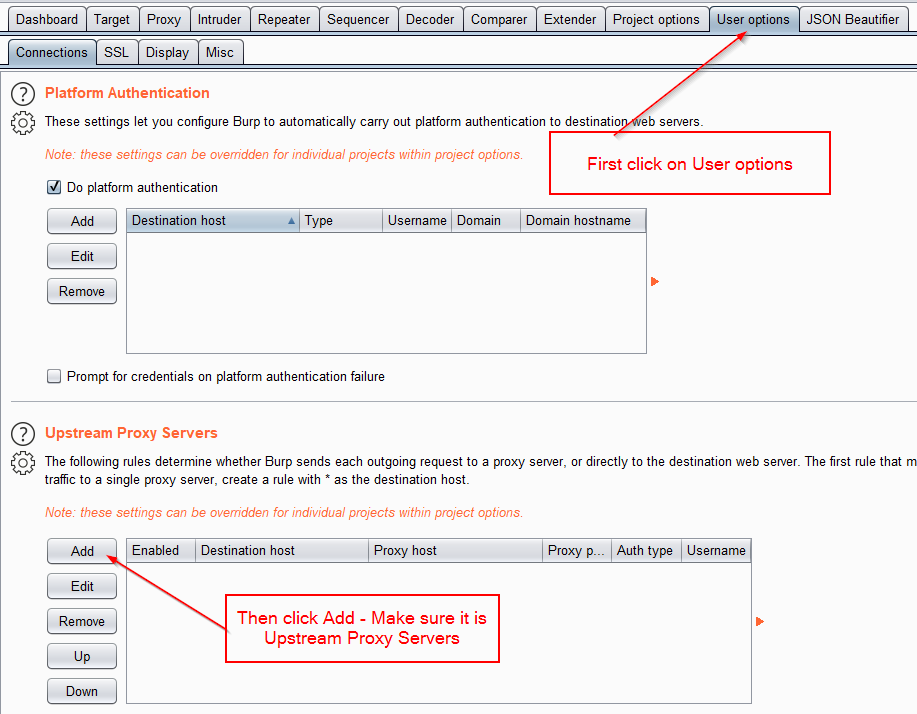
In the Upstream Proxy Servers section of the tab, click the Add button. This takes you to a screen titled Add upstream proxy rule.

On this screen, enter the name of a ProxyMesh proxy, for example, the Open Proxy.
Burp's upstream proxy settings control whether Burp will send outgoing requests to an upstream proxy server, or directly to the destination web server.
Input the fields as needed for your use cases. You can define multiple rules, specifying different proxy settings for different destination hosts, or groups of hosts.
If you leave the Destination host field blank, then, after your other input has been stored, Burp will populate this field with a wildcard symbol (*), indicating that that all destinations are using the proxy (see illustration below).

Add Another Server
Back on the Upstream Proxy Servers section of the User options tab, click Add again. The Add upstream proxy rule screen reappears.
Now add another ProxyMesh server, for example, us-wa.
If you wish to edit the rules for this additional server, you can return to the Upstream Proxy Servers section of the User options tab, and click the Edit button. This time you are taken to an Upstream proxy rule screen in Edit mode.

Edit the rules as needed. As with the open proxy, Burp will populate Destination host with a wildcard symbol if you leave the field blank.
Now you can run tests on both servers and compare results.
Configuring for Browsers
The following link provides general information about configuring your browser for use with Burp Suite.
Also on that site are links to configuration steps for several browsers: